Employing the most effective Drywall Contractors in Edmonton: A Comprehensive Checklist
Wiki Article
Every Little Thing You Need to Learn About Drywall Setup: A Comprehensive Guide
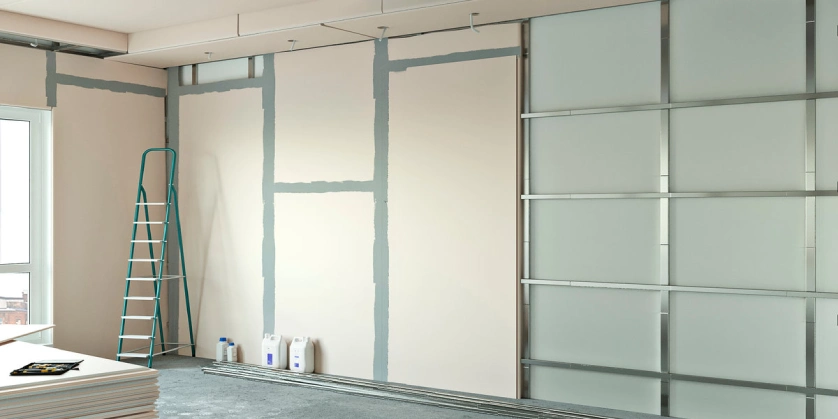
Comprehending Drywall Basics
Understanding the basics of drywall is crucial for any effective setup task. Drywall, additionally known as gypsum board or plasterboard, is a popular building product made use of to create interior walls and ceilings.
The most common types consist of normal drywall, moisture-resistant drywall, and fire-resistant drywall. Routine drywall is ideal for many indoor applications, while moisture-resistant drywall is recommended for areas with high moisture, such as cooking areas and shower rooms.
An additional secret element of drywall basics is recognizing the conventional dimensions and thicknesses readily available. The most common sizes are 4x8 feet and 4x12 feet, with thicknesses varying from 1/4 inch to 5/8 inch. Thicker drywall is commonly utilized for applications that need boosted fire resistance or soundproofing.
Tools and Materials Needed for Drywall Installment
To efficiently mount drywall, it is critical to have the required devices and products handy (Edmonton drywallers). These materials and tools are essential for achieving a professional finish and guaranteeing the longevity of the setupMost importantly, you will need a gauging tape to accurately measure the measurements of the area where the drywall will be mounted. An energy blade is necessary for cutting the drywall to the required shapes and size. Furthermore, a drywall saw can be utilized for making more elaborate cuts, such as around outlets or windows.
Following, you will need a screw gun or a drill with a screwdriver bit to protect the drywall to the wall surface studs. Screws, especially drywall screws, are required for attaching the drywall to the studs. It is essential to utilize the ideal length of screws to make certain a secure and flush setup.
In terms of products, you will require the drywall itself, joint compound for completing seams and spaces, and tape for enhancing the joints. Sandpaper or a fining sand block will be required for smoothing out the joint substance after it has dried out.
Preparing the Area for Drywall Installment
Prior to continuing with the drywall installation, it is vital to effectively prepare the space to ensure a effective and smooth installment process. Preparing the space entails numerous important steps that need to be followed diligently.Firstly, it is important to clear the location of any kind of furniture, fixtures, or other things that might obstruct the installment procedure. This will certainly give the installers with adequate room to function and navigate around. Furthermore, it is advisable to cover the floors and any kind of staying things with safety sheets or drop towels to protect against any damage or particles from falling onto them.
Next, it is very important to examine the wall surfaces and ceiling for any existing damage, such as cracks, openings, or water stains. These issues must be fixed prior to the installment to make sure a smooth and also surface for the drywall. Any type of loose paint or wallpaper should additionally be gotten rid of, and the walls need to be thoroughly cleansed and dusted.
In addition, electrical and plumbing fixtures should be turned off and shielded to avoid any crashes or damages during the setup process. It is essential to shut off the power supply to the location and get rid of any type of electric cover layers prior to beginning the setup.
Lastly, it is recommended to consult with an expert or describe local building ordinance to guarantee compliance with safety and security regulations and acquire any necessary licenses before continuing with the installment. By properly preparing the room, you can make certain a effective and successful drywall installment process.
Step-by-Step Guide to Hanging Drywall
To make certain an effective drywall installment, it is essential to adhere to a step-by-step guide for hanging the drywall (Edmonton drywallers). This process calls for precision and focus to informationFirst, collect all the essential tools and products, including drywall sheets, an energy blade, a drywall saw, a measuring tape, a drill, and screws.
Next, start by determining the dimensions of the wall or ceiling where the drywall will be mounted. Transfer these measurements onto the drywall sheets, marking where cuts require to be made - drywall repair. Make use of a straight edge and an utility knife to rack up the drywall along the significant lines, after that break it along the score line
As soon as the drywall sheets are reduced to size, they can be hung on the wall surface or ceiling. Start at one corner and position the initial sheet up and down versus the framing. Use screws to safeguard the drywall to the drywall repair studs, making sure to leave a little space between sheets for expansion.
Proceed this process, working your means across the wall or ceiling. Ensure that each sheet is level and flush with nearby sheets. Use a drywall saw to eliminate any kind of necessary openings for electric outlets or switches.
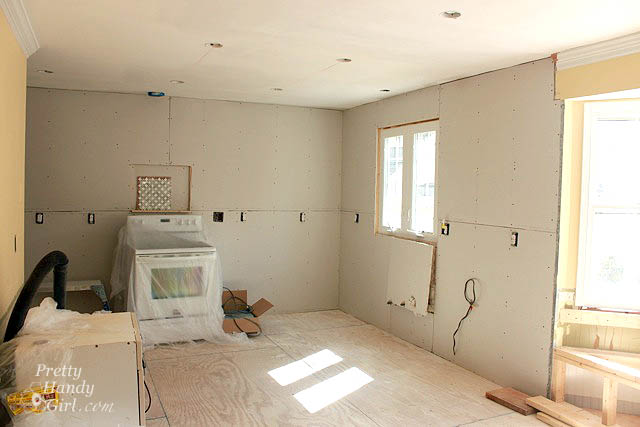
Completing Methods for an Expert Look
Now that the drywall sheets have actually been efficiently hung, it is important to employ ending up strategies that will cause a refined and expert look. Accomplishing a smooth and remarkable finish on drywall calls for mindful attention to detail and making use of correct devices and strategies. One of the very first steps in the completing procedure is to fill the joints and screw imprints with joint substance. This can be done by applying a thin layer of substance over the joints using a taping knife, and after that installing drywall tape right into the compound. When the tape remains in location, one more layer of compound ought to be used over it, feathering the edges to develop a smooth shift. After the compound has dried, it is necessary to sand the surface area to get rid of any type of blemishes and develop a smooth surface. A post sander or fining sand block can be used for this objective. The wall surfaces should be keyed and repainted to finish the ending up process. Utilizing premium paint and using it uniformly with a roller or brush will make certain a resilient and specialist surface. By adhering to these ending up methods, your drywall setup will have a specialist and polished appearance.Verdict
In verdict, comprehending the fundamentals of drywall setup is vital for an effective task. With this detailed guide, any individual can with confidence take on a drywall setup task.The most usual types include routine drywall, moisture-resistant drywall, and fire-resistant drywall. Regular drywall is suitable for most indoor applications, while moisture-resistant drywall is advised for locations with high moisture, such as bathrooms and kitchens. Screws, particularly drywall screws, are necessary for attaching the drywall to the studs. These issues should be repaired prior to the installation to guarantee a smooth and even surface area for the drywall. By adhering to these ending up methods, your drywall installment will have a polished and expert appearance.
Report this wiki page